


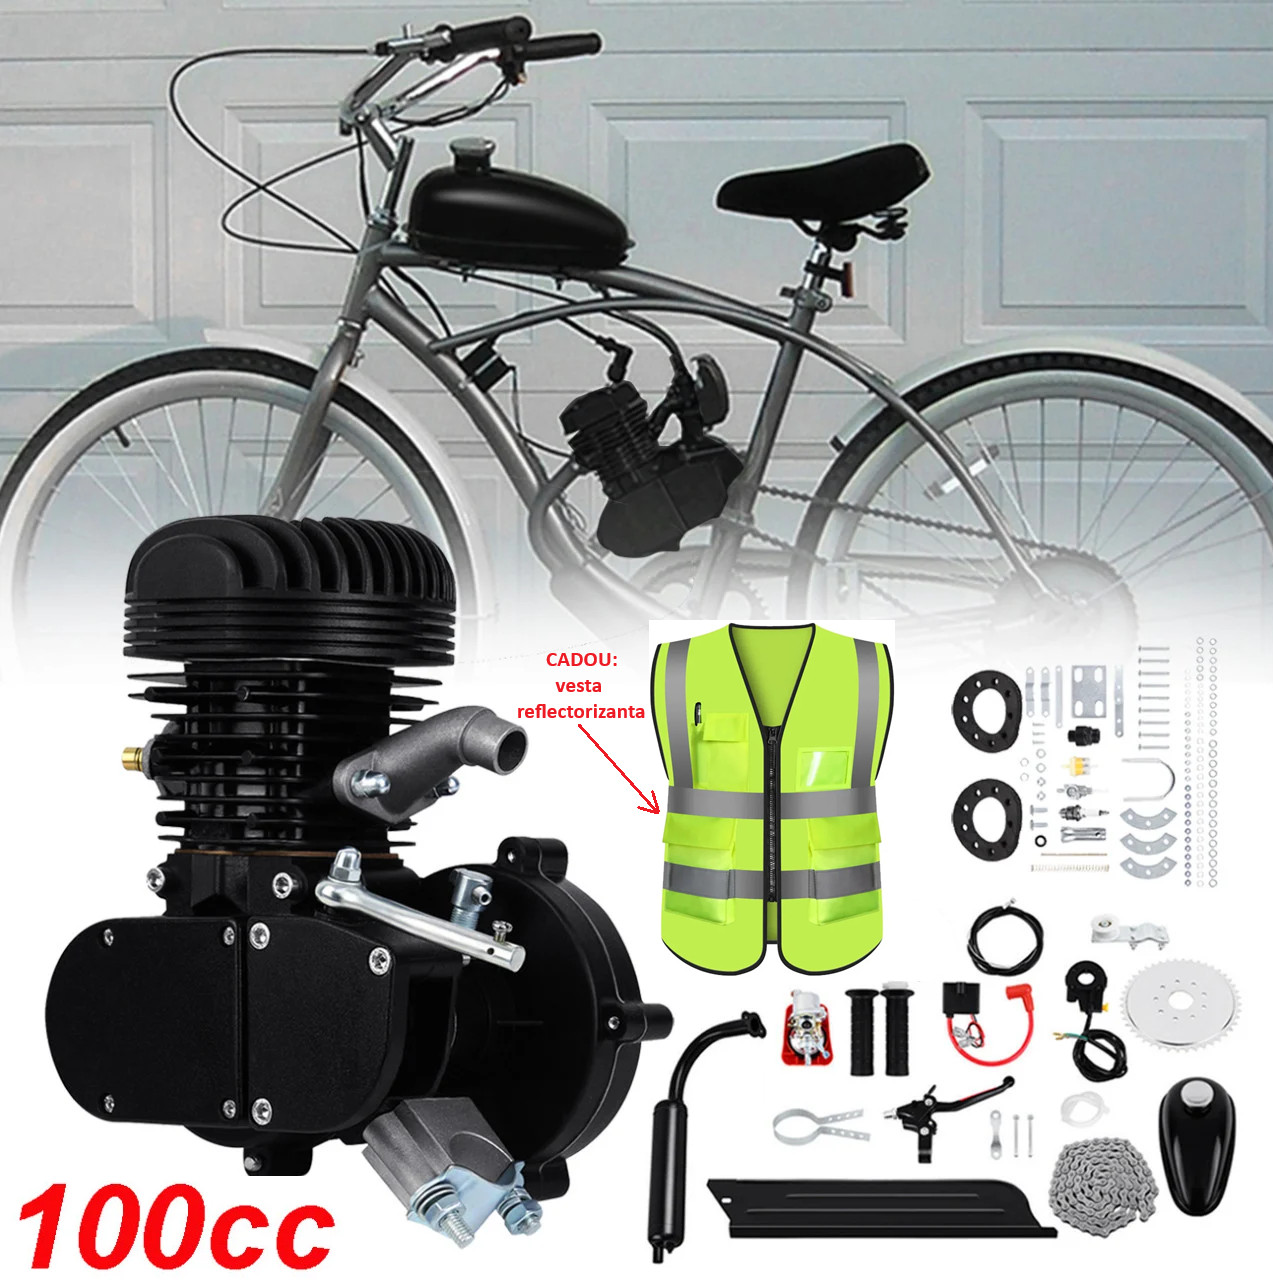
Bicycle engine kit 100cc 2 strokes (Black)


Our benefits
Description
Promotion! Buy 5 pieces of engine kits and receive a 10% discount! *
* Promotion valid within the available stock. The promotion applies to all 2-stroke petrol kits. You have to add 5 pieces regardless of the model.
* Not cumulated with other discounts
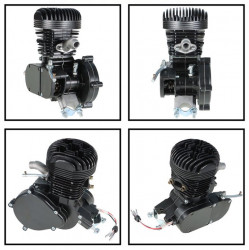
Complete engine kit 100 cmc 2 TIMES
Laws vary from state to state and city to city. For complete legal details, contact your local state and / or city authorities. The end user or installer becomes the manufacturer of the vehicle and assumes all legal responsibility.
* We can ensure for a fee the installation of the kit on the bike (the place where the assembly will be done: Pitesti - Arges). For details please contact us.
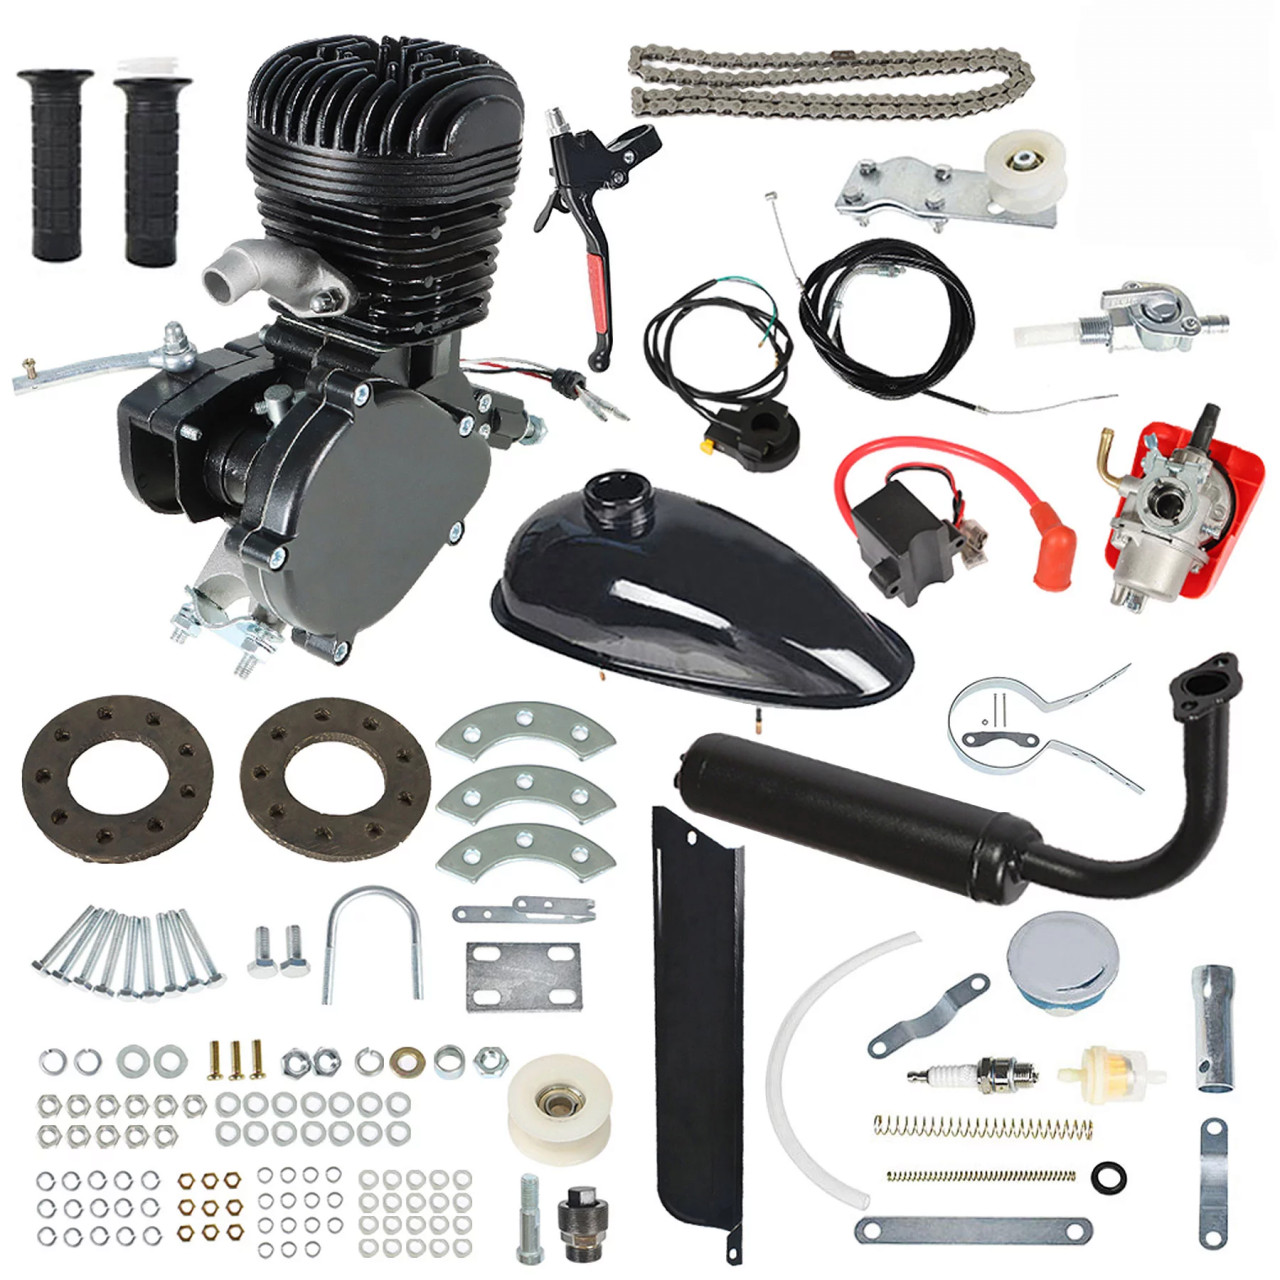
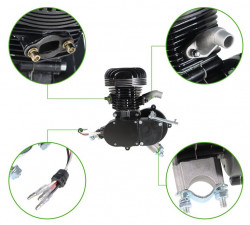
The set consists of:
3.2 horsepower engine (piston bore 50mm), cylinder capacity 100cc
Maximum speed 80Km / h
carburettor
Exhaust
0.8 Liter petrol tank
Pinion Drive with 44 teeth
Scooter transmission chain
Chain tensioner with bearing
Chain protection
Pinion flange
Electronic ignition
Throttle lever with button
Gas tap
Clutch lever with lock
plug
Installation details:
Some technical and mechanical skills are required to install your engine. Some buyers can finish the job in 2 hours while others can even take 2 days. In the end, no matter how long it takes, you will get great pleasure and satisfaction by completing this project. At the same time, you will understand the system more easily and it will help you to maintain and operate it. Good luck.
The easiest installation can be done on a standard 26 ”V-shaped frame with a 25 mm tubular profile. But it can be mounted and adapted on other bikes but then it must be adapted to existing conditions. These motors also contain non-standard frame adapters - oval or larger in diameter - so that the motor can be attached to the frame. Even if at the beginning of assembly you will spend more time for finishes and adjustments instead you will ensure thousands of kilometers of operation without operating incidents.
1. Mount the drive pinion on the wheel as follows:
a. Remove the bicycle chain
b. Unscrew the nuts that hold the rear fork wheel
c. Remove the wheel from the fork
d. Unscrew the sprocket flange assembly consisting of 2 rubber rings and 2 steel crescents
e. Cut each rubber ring once. Very important! IT WILL ONLY BE CUT BETWEEN HOLE!
f. The two rings are mounted on each side of the spokes so that the cuts are not in the same direction.
g. Mount the gear pinion on the outside by inserting screws (9 pcs) through the pinion, outer rubber ring, through spokes, inner rubber ring, steel crescent, grover washers, flat washers, M6 nuts. In the first phase, only tighten all the screws without tightening
h. It is passed to their successive tightening without tightening to the end each. This tightening is done gradually, with equal force until all the fixing screws are tightened at the end
i. Check the flatness of the pinion. The deviation (inclination) from the vertical plane cannot be greater than 1.5 mm. Otherwise, adjust the screws that cause the deviation
j. The wheel is reassembled, considering its centering when tightening on the fork.
2.Installing the motor on the metal frame
The engine is installed on the metal frame of the bicycle.
If the frame has a round section and a small diameter, then the clamps with which it is equipped from the manufacture will be used.
In the case of another type of frame, the screw with the extension plate will be used. Generally, the vertical bar is of round section so that it will not raise problems for fixing. The extension screw will be used for the usual bar (the front one). A pre-assembly (with the exhaust pipe) will be made so as to determine the optimal position for the engine on the frame. The position of the drive pinion will also be followed so that the slot in its cover is located so as to allow the mounting and operation of the gear chain.
a. After marking the front clamping point (in the case of the large diameter frame), a hole will be made in the frame so as to allow the clamping screw to pass through the extension.
b. Attach the front mounting plate
c. Remove the front crescent of the engine
d. Pass the engine mounting screws through the mounting plate holes
e. The grover washers, the M6 blades and nuts are inserted and then they are tightened with equal force and symmetrically. The last position of the motor will be made so that the motor is centered in the axis of the frame.
f. it is checked if the exhaust touches the frame or the flange as well as if it is mounted comes into contact with the pedals. If one of the situations occurs, the engine will be repositioned so as to eliminate these inconveniences.
recommendation
Rubber sleeves can be used to eliminate the vibrations but also the slipping of the motor on the frame. At the same time
also avoid damaging the paint on the frame.
If necessary, washers or spacers can be inserted between the mounting plate and the frame so that tightening the nuts is easier.
3. Exhaust fitting
Check if the exhaust touches the frame or flange as well as if it is mounted comes into contact with the pedals. If one of the situations occurs, the engine will be repositioned so as to eliminate these inconveniences.
Install the exhaust avoiding contact with the frame, mounting flanges or engine. Otherwise the engine is repositioned. Use the exhaust gasket as well as the flat washers and grover.
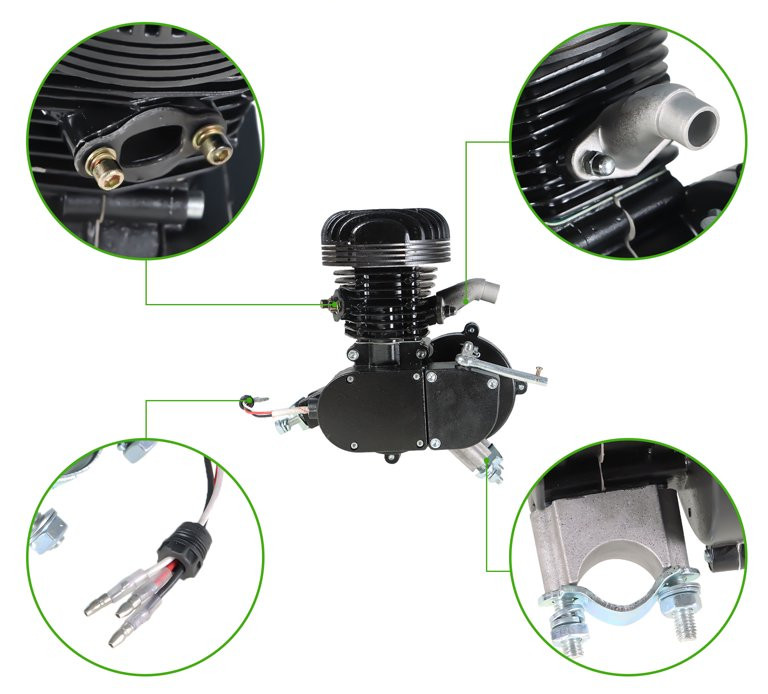
4. Carburetor assembly
Mount the carburetor on the intake pipe. Tighten the retaining screw on the retaining clip on the carburetor - inlet pipe connection. Mount the carburetor with the air intake pipes down
5. Fixing the controls on the handlebars
Before mounting the cables, their shirts can be removed and the cables can be greased with Vaseline, after which they can be inserted back into their shirts.
a. Mount the throttle on the right side. Loosen the cover fastened in 2 screws and thus insert it on the handlebar handle. The upper cover contains a pin with the role of fixing and preventing the rotation of the lever support. Check the position of this pin on the handlebars, mark the hole and drill with a drill and a drill. After this hole has been given, the upper cover of the lever can be mounted and the two screws can be tightened. The free end is fixed to the carburetor cover.
b. Mount the clutch lever on the left side so that both the brake and the rubber handle enter.
Attach the end piece to the free end of the clutch cable by tightening the screw. It is positioned on the cable so that the control rod no longer has a degree of freedom and no longer twists around the shaft. If it is not adjusted correctly when the clutch lever is actuated, the engine will not disengage and will remain permanently attached to the gear pinion.
6. Fixing the fuel tank to the frame
Attach the fuel tank to the upper horizontal frame towards the handlebars. As in the case of fixing the motor, rubber sleeves can be used. Tighten the 4 fixing screws, taking into account the highlighting of the possible control cables of the bicycle. The supply valve is fixed to the supply pipe together with the sealing gasket. Additional gaskets can be used if the situation requires it.
7. Electronic ignition assembly
The electronic ignition is fixed on the frame of the bicycle. It will be taken into account that there is enough cable to supply the spark plug from the engine. For fixing you can use the metal flange in the set or a quick plastic flange passed through the fixing holes of the electronic burn. Its location as far away from the engine as possible will be considered in order to reduce the heat transfer from the engine.
8.Container disassembly
At this point, the spark plug is removed if it is mounted on the engine. This can be removed from the set with the help of the spark plug wrench.
The spark plug will be reassembled ONLY at the end of the installation using these steps:
If the spark plug has a cover on top of it then it is unscrewed and removed so that the plug can be inserted into the spark plug head. Failure to do so may result in destruction of the record.
9. Tensioner mounting
Mount the chain tensioner on the horizontal fork, leaving the tension wheel in the minimum position.
Removing the sprocket cover
Remove the cover that houses the drive pinion. Loosen the 3 screws with a straight screwdriver.
Chain assembly
Mount the chain on the drive pinion. This is done with the spark plug wrench that rotates the motor shaft. At the same time, the chain is wound. The other end happens over the sprocket on the wheel but also over the tensioner. In this way, the necessary length of the chain can be estimated. Keep in mind that the closing hole must also be inserted for sure.
Reducing the size of the chain
The length of the chain is reduced. After it has been marked to the required length and the removal from the sprockets, the bolts are removed. A 3 mm mandrel, a bushing and a hammer can be used. Repeat the Chain Assembly step. The safety hole is inserted as well as the safety.
Tensioner adjustment
Raise the tensioner wheel to the required position so that the chain is stretched sufficiently but not excessively hard. Tighten the bolts securing the tensioner and the tensioning wheel.
Last checks
Make a few forward and backward movements of the bicycle with the clutch lever pulled to see the flatness of the chain with the 2 sprockets but also with the tensioning wheel. If the situation requires it, the components with the problem are adjusted.
Details
Promotions
What customers are saying
Благодаря
Plusuri:
- preț accesibil
- produse de calitate
- se montează ușor
- consum mic (undeva la 2l/100km)
Minusuri:
- Momentan nimic